New to Overwatch? Get caught up on everything Overwatch League by reading our introduction.
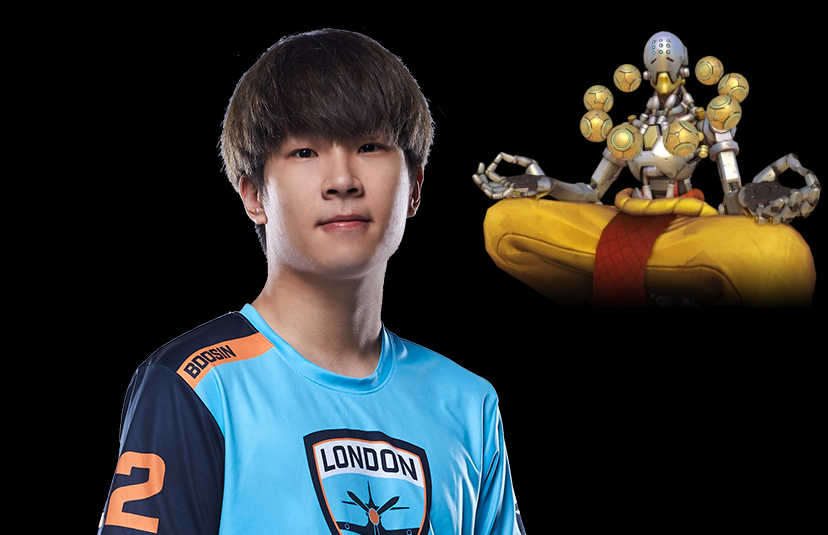
The London Spitfire have so many talented players on their roster it’s insane. You could discuss Profit and Birdring for literal hours going back and forth about who can carry their team harder. Then you have Gesture creating all sorts of space for the back line, while Fury is having an incredible season eating almost a grav a game. But today we are going to breakdown how Bdosin, London’s off-support, surprised Boston and pulled the match into London’s favor.
The last time these two teams met, the match came down to a last minute push on King’s Row. Boston was able to hold London short of the last point, so all they needed to do was push 1 meter farther. The fight was shaping up to be a clean Boston win.
Let’s Watch the full fight and see what happened.
By just a hair, rCk missed Bdosin with his EMP and Boston lost the fight because of it. This one small play by Bdosin prevented another reverse sweep attempt from Boston. But after watching this series multiple times over, it’s obvious that this match wasn’t defined by one play. It was won by Bdosin having one of the cleanest games of his OWL career. I want to take a look at how that happened, and what Boston can do to stop him in the upcoming match against London.
Superior Positioning
Bdosin’s strongest asset he brought to the match was his incredible positioning. He constantly creates situations where Boston was left with an impossible decision. Does Boston attempt to attack the back line first in a 3-3 mirror? Or do they believe they can power through the front line and clean up the healers after? The usual answer is the latter – burst down the enemy Reinhardt or Zarya, and then quickly roll the rest of the team over since their main source of damage is gone.
Having seen his fair share of GOATs, it looks as though Bdosin decides to create as much pressure as possible from difficult to reach positions. By staying far away from the chaos, he is able to force Boston to take fights that are out of their favor. Take this example from the first map Busan – Meka Base.
Busan – Meka Base
As Boston approaches the point, London is posturing just for a moment to build ult charge and to allow Gesture to return to the point. In the meantime, Bdosin takes advantage of the high ground that overlooks the point. The strength of Bdosin’s position lies in the fact that he is both uncontested and able to see the entire point. Why is this important? From where Bdosin stands, he is able to generate ult charge twice as fast as Aimgod. Being able to have line of sight to heal as well as deal damage, Bdosin gains 55% ult charge in 27 seconds. To compare, Aimgod gains 41% in the same time span.
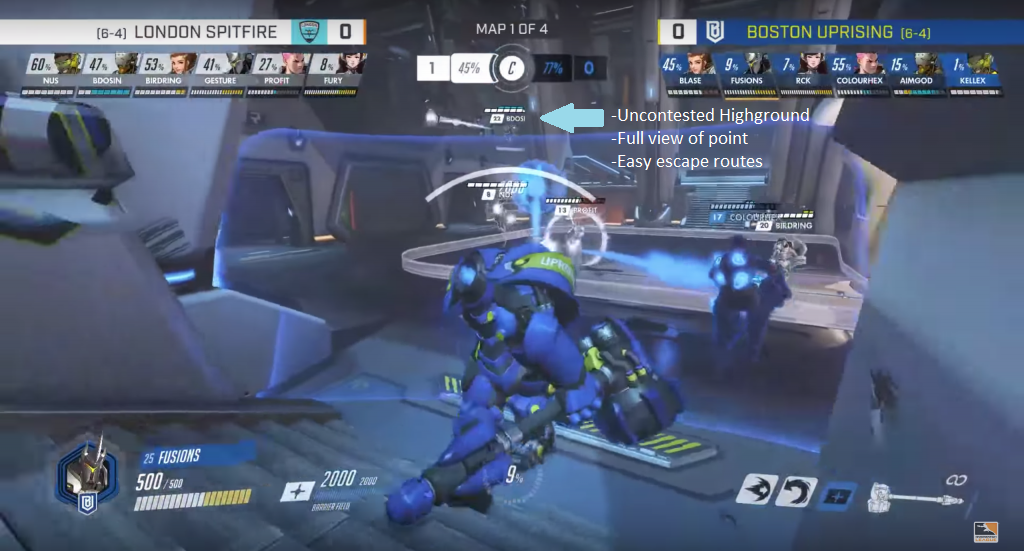
Even worse for Boston is that even if they do decide to pressure Bdosin on the high ground, they would waste large amounts of time to force him to simply rotate back to his team. Because he plays near the ledge behind his team, Bdosin puts himself in a spot to be able to drop down and ult if needed. From this one fight, London is able to snowball their advantage into a map win.
Paris Defense
As a bonus example, I wanted to share this little clip from the next map Paris. London has given up the first point easily to Boston, and now face a large time bank to hold Boston from completing the map. It’s a brief moment, though I think it really defines why these players are pro and most people are not.
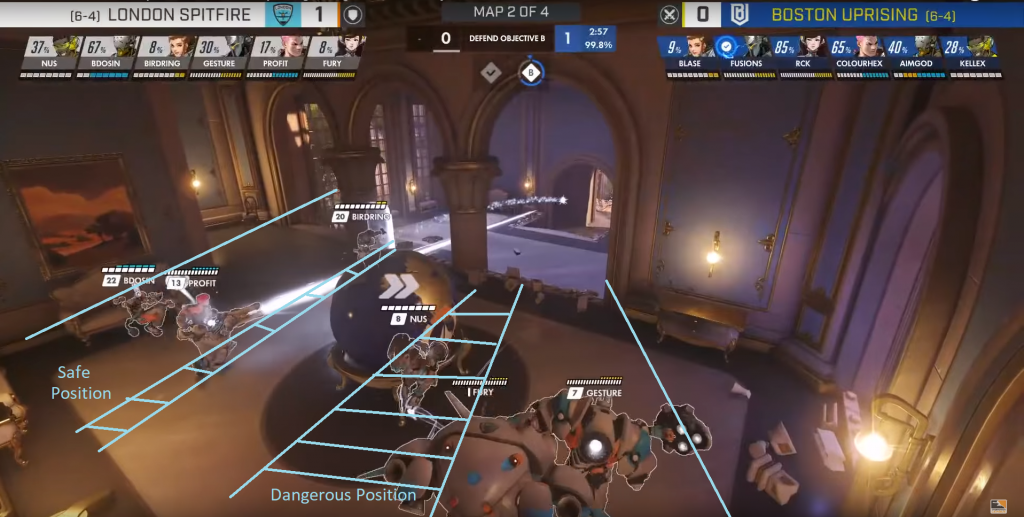
Boston eventually pushes London out of this position, but Bdosin sets up in a spot with 3 forms of protection against the enemy Zen. Bdosin sets up behind Birdring here, but he has the option to stand behind the globe as well as Gesture. From this position, Bdosin also has two very easy escape routes behind him and to the right towards point. Small moments like these are excellent for showcasing how each position should bring value to your team, even if you aren’t in a fight.
The Clutch Factor
Just like physical sports, the attributes that separate a good player from a great player are the intangibles. During this series, Bdosin displays what it means to have incredible game sense. His plays on Paris and King’s Row highlight what exactly “the clutch factor” can do for a team.
Paris Attack
If you re-watch this series, you’ll start to notice a trend in Bdosin’s play. He solely focuses the Boston supports in the posture phase. The pressure he inflicts onto the Boston backline causes Aimgod and Kellex to position themselves in awkward areas.
On the second Paris attack, Bdosin turns on the heat and brings Aimgod to half health the moment he peeks the choke. The shock of almost getting one-shot forces Aimgod to back up and play safer around the small wall and Blase. This also forces Aimgod to use bio-nade, a crucial cooldown Boston needs in order to slow down London’s push.
Moments later, Bdosin ends the game with a pick on Kellex to break the stalemate. The death of Kellex creates a flurry of opportunities for the London attackers.
First and foremost – Boston no longer has a defensive ultimate because they had elected to play Ana in hopes to counteract Bdosin’s transcendence. Second, Boston no longer has the speed boost to control the pace of the fight, once Lucio is gone London is given the freedom to attack when they choose.
Without that kill, Boston has a shot at winning the map and gaining momentum into King’s Row. Unfortunately Bdosin had other plans.
King’s Row Defense
Down 0-2, Boston needs to create a spark to get the momentum back in their favor. Up until this point, Boston has not brought out their Sombra GOATS despite having resident expert rCk in the lineup. It only makes sense that now would be the time to lean back on “the crutch” that is Sombra.
Sure enough, that is exactly what we see from Boston on their first attack. Even though Boston is able to complete the map, it was obvious the match would boil down to Bdosin’s transcendence vs rCk’s EMP. You can guarantee both players knew this as well, but only one was able to come out the victor. When the dust settled, Bdosin dodged 4 out of the 6 EMP’s from rCk.
How was the battle so lopsided? Bdosin knew that each fight he had transcendence available, he needed to watch and listen for Sombra. Understanding that Sombra is the Boston win condition, Bdosin positions himself in spots that allows him to either ult early or avoid a hack altogether. Most importantly, when the last fight came around, Bdosin was simply more clutch than rCk.
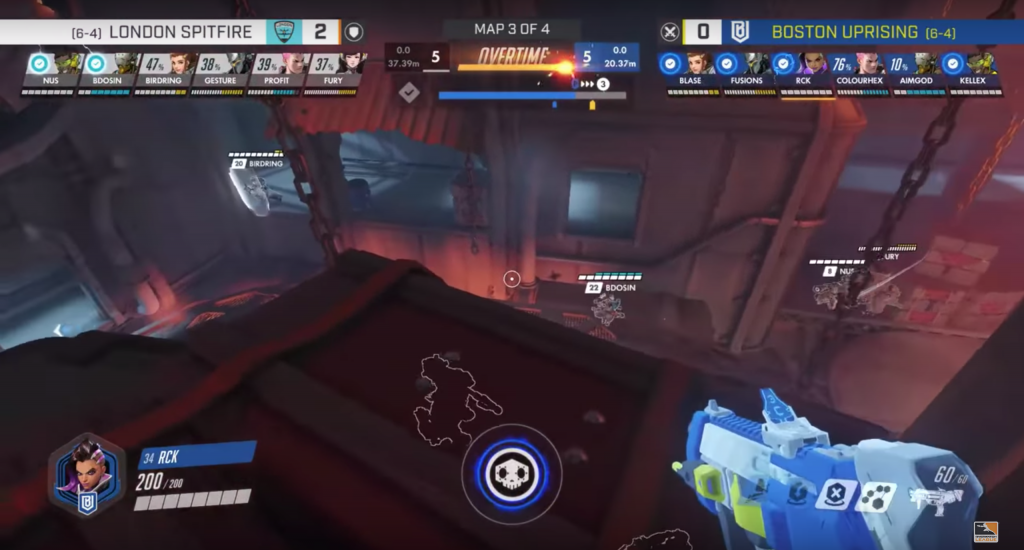
When you watch the clip at the start of the article, you can see rCk trying to line up his EMP. He looks to hit both tanks and DPS, but Bdosin knows he is out of line of sight. Staying in that room forces rCk to either commit fully to hacking only Bdosin, or hack the rest of London with Bdosin left able to use his ultimate. By taking a small step back, Bdosin ends the match with a bang. Bdosin’s clutch dodge leads to a disappointing loss for Boston.
Moving Forward for Boston
This time around, I believe Boston can beat the Spitfire if they neutralize Bdosin’s play style. It’s important to not let him become comfortable standing in the back line uncontested. Whether it be Sombra or a triple-DPS team composition, Boston needs to be more proactive against London. After Busan, Boston was down 31-12 in terms of eliminations. Against any opponent this is a terrible ratio, let alone a team as strong as London. As we watch the games this weekend, keep an eye out for the thrilling rematch of rCk and Bdosin. Hopefully this time rCk waits just one more second to use that EMP.
All clips featured in this article are courtesy of Blizzard Entertainment
Be sure to follow Brock on twitter for more breakdowns and analysis #BostonUp